
Add to Cart
CE Certificate Disposable Gastrointestinal Circular Surgical Stapling
Product Name
Disposable Circular Staplers
Application
It is applicable for end-end, side-side and side-end in esophagus
and gastrointestinal procedures.
Instructions for Use
1. Open the package to take out the stapler and remove the
cartridge cover.
2. Put the stapler into the organ to be stapled until the anvil is
exposed entirely.
3. Turn the adjusting handle at the rear of the instrument
counterclockwise to open the space between the anvil and the
stapling & cutting assembly to admit two broken ends of the
stapling site. Tighten up the purse at one end of the stapling
& cutting assembly and tie up the purse string to the
puncturing shaft with a proper force, making sure that all the
tissue falls into the range of the stapling & cutting assembly.
Next, tighten up the purse at one end of the locating shaft and tie
up the purse string to the locating shaft with a proper force,
making sure that all the tissue falls into the range of the anvil.
4. If the instrument needs to pass through from the organ which is
closed at one side, separate the anvil from the instrument first,
and then turn the adjusting handle clockwise to pull back the
puncturing shaft to the stapling assembly, thus avoiding tissue
damage when it is inserted into the organ .
5. Put the anvil into the organ for purse ligation. It's better to
apply some lubricant such as K-Y glue to the anvil to make the
surgical operation convenient .
6. Insert the stapler into the organ, with its stapling &
cutting assembly close to the site to be stapled; turn the
adjusting handle counterclockwise to pull out the puncturing shaft
slowly to fully pierce the tissue. If the double stapling technique
is necessary, please be sure that the puncturing shaft pierces from
the center of the suture so as to avoid the excessive tissue
accumulating around the puncturing shaft .
7. When the puncturing shaft is totally exposed, the locating shaft
on the anvil can be encased in the puncturing shaft. When a clear
"click" sounds, it means that the connection is completed.
8. Turn the adjusting handle at the tail clockwise to draw the
tissue at both ends together until the indicator gets to the green
zone(the force shall not be too great to crush the tissue).
Note: The instrument is equipped with safety design, so that the
security button cannot be opened when the indicator is not within
the green zone. Be sure not to open it violently. If the indictor
still remains outside the green zone when the instrument is totally
tightened, it means that the tissue in the instrument is too much,
and the instrument shall be opened for separation again.
9. The instrument can be fired when the security button is opened
and the handle is held. When a clear "click" sounds and an obvious
feeling of penetration is gotten, it means that the firing has been
completed.
10. Turn the adjusting handle counterclockwise to draw out the
stapler slowly.
11. If there are sites which are not fully stapled in the
operation, please suture them.
Specification
| Specification | Ouside Diameter (mm) | Cutting Inner Diameter (mm) | Staple Quantity (pcs) | Anvil Color |
| QYW-21 | 21.8 | 13.2 | 18 | Dark Blue |
| QYW-23.5 | 24.3 | 15.2 | 18 | Gold |
| QYW-25.5 | 26.2 | 17.2 | 20 | Blue |
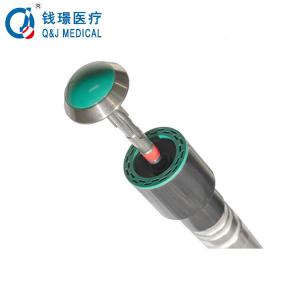
| QYW-28.5 | 29.2 | 20.2 | 24 | Green |
| QYW-31.5 | 32 | 22.2 | 30 | White |
| QYW-33.5 | 33.8 | 24.2 | 32 | Gray |
Product Photoes