
Add to Cart
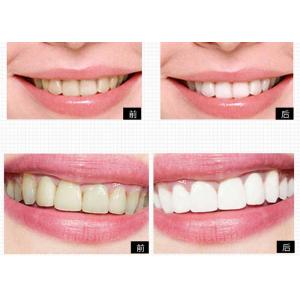
Private Logo Personal Care Products Tooth Bleaching System For Home Teeth Whitening
Step 1: Place the tray over the upper teeth without placing the tray in
boiling water. Practice with your tongue on the roof of your mouth
and touching the inside of the tray. Suck the air from the tray.
This contours the guard to the inside surface of the teeth. When
finished repeat with the lower tray.
Step 2: Bring water to a boil. The bowl should be at least 4" deep to
ensure the tray's full immersion. Remove the container from the
heat and place one tray in the hot but not boiling water. Leave the
tray in water for 5 seconds. Make sure the edges do not fold onto
each other.
Step 3: Lift the tray vertically from the water using the tab. Carefully
and quickly place the tray around the teeth and then immediately
perform the procedure outlined in step 1.
Step 4: Once you are satisfied with the fit, trim the front tab away from
the tray with scissors. Make sure it is flush with the front
surface of the tray.
Step 5: Place a small bead of gel per tooth in the inside of the tray
(.5cc or less per tray). The gel might irritate the gums if the
trays are overloaded. Insert the trays very carefully keeping the
gel on the teeth and away from the gums. The Gel Contains 44%
Carbamide Peroxide. Now insert the light and turn on. The LED light
is to be worn for the intire duration of the treatment. Be sure to
turn off to conserve batteries when finished.
Step 6: Wear the trays for 15 minutes. If sensitivity or irratation
occurs wait 24 hours between treatments and use less gel. Be sure
to rinse trays thoroughly after use. Repeat process daily until you
reach the desired shade.
Final Step: After completing the bleaching process it is always a good idea
to take a toothbrush and gently wipe away any excess gel that
remains on the teeth and gums to prevent any possible irratation.
rinse excess gel from your toothbrush completely.
