
Add to Cart
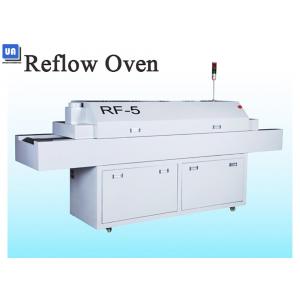
Lead Free 5 Zones Small Reflow Oven Euiqpment RF 5 Mesh PCB Convery
Small 5 Zones Reflow Oven Euiqpment RF-5 Lead Free SMT Reflow
The Features of Reflow Oven RF-5 :
1, Windows10 operating system, can realize the free switching of
the operation interface in Chinese and English.
2, Siemens PLC+ PID closed-loop control to achieve high prectise
temperature control and repeatable profilies.
3, Modular design,convenient and fast maintenance,reducing
maintenance time and cost
4, The rail surface is treated with hardening process to make it
more stable.
5, Sound and light alarm and information prompt function with
various faults, including temperature deviation, speed
deviation,detention board and drop board, wind fault and error
operation, etc.
6, The new gas management system can make the hot gas exchange
efficiency in the furnace higher, to obtain better thermal
compensation and thermal efficiency, and fully meet the
requirements of various lead-free soldering processes.
The Specifications of Reflow oven RF-5
| Model | RF- 5 |
| Cooling Method | Forced Air |
| No. of Cooling Zones | 1 |
| PCB Converying Method | Mesh only |
| Startup Power | 24 KW |
| Converyor Height | 880±20 MM |
| Weight | 550 KG |
| No. of Heating Zones | Tops 5 & Bottom 5 |
| Dimension ( L*W*H ) | 3000*650*1390 |
| Normal Operation Power | 4 KW |
| Temp Deviation on PCB | ±5C |
| Temp Control Precison | ±2C |
| Length of Heating Zones | 1800 MM |
| Temp. Setting Range | Room Temp ~300C |
SMT reflow soldering operation process is introduced in detail
1. Preparation before reflow soldering
(1) Check the lubrication of each rotating shaft bearing seat.
(2) Check whether the rotation of the transmission chain is normal,
to ensure that it is squeezed and jammed, and that the chain meshes
well with each sprocket.
(3) Clean the furnace cavity, and do not put anything other than
the workpiece in the machine.
(4) Before each use of the equipment, a spot check should be
carried out and a record should be made according to the
requirements of the spot check card.
2. Reflow soldering boot
(1) Turn the main power switch (CONTROL) to the ON position, and
press the UPS power switch to "UPSON" above Is. The machine enters
the running state and enters the main window of the control system.
(2) Check the main screen of the work, and set whether the
temperature and speed of the PD3213B are consistent with the
required working status of the printed board. If they do not match,
click "File", a drop-down menu will pop up, and select the "Open"
command to display the "Open" dialog box. Click the scroll bar and
select the saved heating parameter file. Click the "Cancel" button
to return to the main window.
(3) Check the main work screen again to see if the set temperature
and speed are consistent with the required working status of the
printed board.
(4) Select the "Panel" command to display the "Operation Panel"
dialog box. "Manual/Timing" switch: switch to "Manual". "ON/OFF"
switch: switch to "ON". "Heating on/heating off" switch: switch to
"heating", at this time the "fan" and "conveying" switches are
automatically turned on. The equipment starts to operate, and the
yellow light of the three-color lighthouse is on. Observe the
operation of the equipment, heating and heating, until the
temperature reaches the set value, the green light of the
lighthouse is on.