AT Blood Glucose Meter, Monitoring Devices For Self Testing By
Diabetics, Blood Glucose Monitoring System
The AT blood glucose monitoring system will give you accurate readings from fresh capillary whole blood.
This product is for professional use in medecal institutes or for
self-testing by diabetics. Test results serve only as helpful
information, not as proft for clinical diagnoses.
| Specification | |
| Cat. No. | Product Description |
| Product Namme | AT Blood Glucose Meter |
| Size | 83.6mm (L) x 51.6mm (W) x 15.3mm (Thickness) |
| Glucose Test Range | 1.1 - 33.3 mmol/L (20 - 600mg/dL) |
| Results Dispaly | Plasma quivalent |
| Minimum sample volume | 0.6μL |
| Test time | 5 seconds |
| Battery | 1 x CR 2032 3.0V coin cell battery |
| Battery lige | >1,000 radings |
| Glucose Concentration Units | mmol/L depending on the standard of your country. |
| Memory storage | 500 test results with date and time stamp |
| Auto shutdown | Automatci shutdown after 2 minites |
| Display size | 40mm x 42mm |
| Weight | About 50 grams (including battery) |
| Operating temperature | 5 - 45℃ (41-113℉) |
| Operating humidity | 20 - 90% (non-condensing) |
| Hematocrit range | 30 - 55% |
Product Components
Depending on which product you purchased, some of the components
may to be purchased seperately. Please check the list of components
printed on the box for details on which components are included
with your purchase.
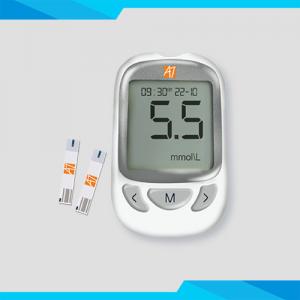
Blood Glucose Meter: The meter reads the test strips and displays the blood
glucoseconcentration. Use this diagram to become familiar with all
of theparts of your meter.
Test strips: AlIChekTM blood glucose test strips contain chemical reagents. Afterthe test
strip is placed into the test strip port and a blood sample
isapplied, the blood automatically wicks into test window. A
transientelectrical current is generated, and this current is
measured todetermine the correct blood glucose level reading.
Control solution: Control solution is a glucose solution of known concentration
that is usedto confirm that your ÃlChek"' glucose meter and test
strips are workingproperly. It is important to run a quality
controll test regularly to make surethat you are geting accurate
results.
Testing blood glucose:
1. Insert the test strip all of the way into the test strip port,
and the meter will turn on automatically. If the audio is on, you
will hear a "beep"sound, and all of the icons on the display will
turn on at the same time.If the strip is inserted upside down, the
meter will not turn on.
2. The test strip has been inserted correctly when you see the test
strip icon and flashing blood drop icon. If the test strip is not
correctly inserted, the meter will not turn on - repeat the steps
above.
3. Apply blood to the sample area of the test strip. If the audio
is on, the meter will beep, telling you that enough blood has been
applied and the meter will start the measurement.
DO NOT:·
l Apply blood to the front or back of the test strip.·
l Smear the blood drop onto the test strip.
l Press your finger against the test strip.
4. The display will count down 5 seconds during the measurement
process. If the audio is on, the test will end with a beep. If you
applied a bloodsample but the meter does not begin a countdown, you
may reapply a second drop of blood within 3 seconds.
If you press the ">" button, the test results will be marked
with the "#" icon. Results marked with "#" symbol will not be used
in the 7, 14, 30,60 or 90 day average calculations. If you
accidentally mark your result with the "#" icon, simply press the
">" button again to cancel the mark. After marking a result with
"#", please test again with a new strip.
If an error code is displayed, please check the
troubleshotinginstructions. If "HI' or "LO" symbol is displayed,
refer to the"HI" and "LO" Messages section.
5. Record valid results in your logbook with date and time, and
compare them to the target goals set by your healthcare
professional. (Refer to Suggested Testing Times and Target Goals in
Instruction Manual)
6. After the test has been completed, slide the test strip ejector
to pop out the test strip, and the glucose meter will automatically
turn off.
ORDERING INFORMATION
AGL-NST-a | Glucose Meter Set, without Start Kit (Results formula:mmolL) | Whole Blood | 1 Unit |
AGL-NST-b | Glucose Meter Set, without Start Kit (Results formula: mg/dL) | Whole Blood | 1 Unit |
AGL-ST10/ST25-a | Glucose Meter Set, with Start Kit (Results formula:mmolL ) | Whole Blood | Start Kit: 10pcs/25pcs |
AGL-ST10/ST25-b | Glucose Meter Set, with Start Kit (Results formula: mg/dL) | Whole Blood | Start Kit: 10pcs/25pcs |
AGL-S50 | Glucose Strip | Whole Blood | 25 strips/canister, 50 strips / box |
AGL-S50C | Glucose Strip | Whole Blood | 50 strips/ canister |
AGL-S100C | Glucose Strip | Whole Blood | 100 strips / canister |
AGL-IS50 | Glucose Strip | Whole Blood | 1 strip/pouch, 50 strips/ box |
AGL-OST10 | Glucose Start Kit | Whole Blood | 10 pcs |
AGL-OST25 | Glucose Start Kit | Whole Blood | 25pcs |
AGL-L100 | Lancet | | 100 pcs/box |
AGL-CS1 | Glucose Control Solution 1 | | |
AGL-CS2 | Glucose Control Solution 2 | | |
AGL-CSS | Glucose Control Solution Set (Control solution1&2) |
|
|